Understanding External Client Apps In Salesforce
What is an External Client App in Salesforce?
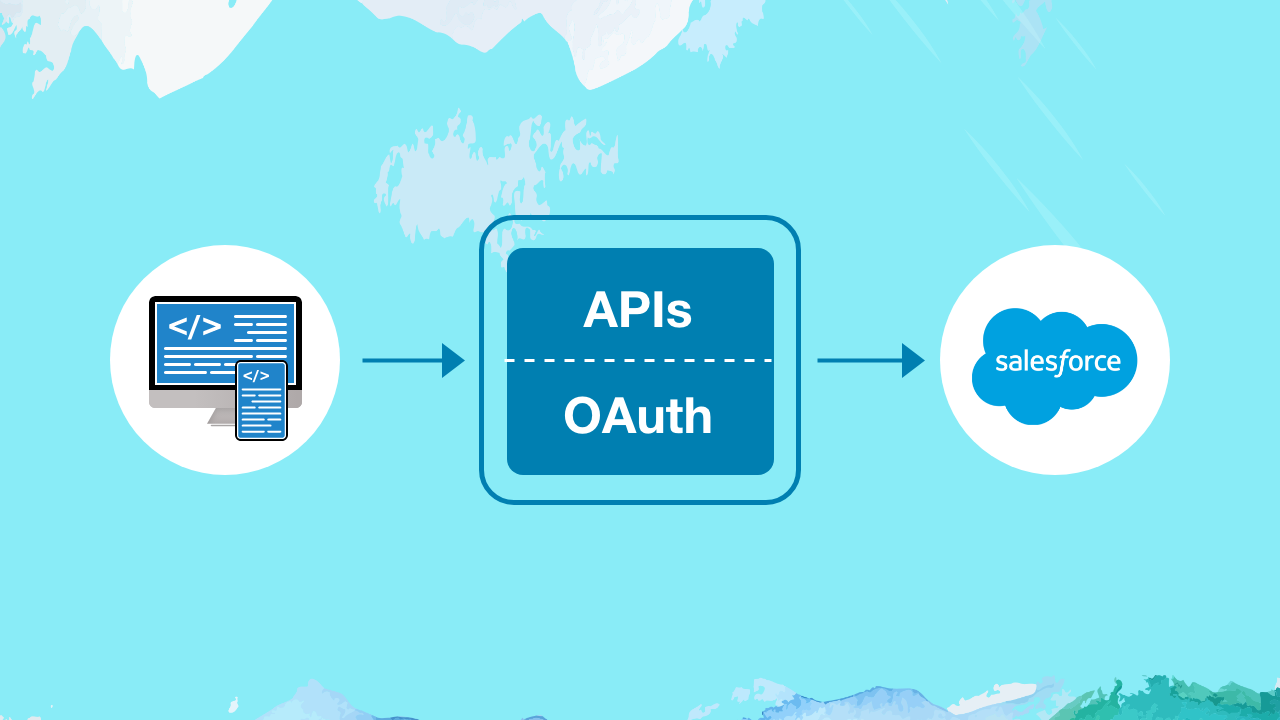
An External Client App is any application that connects to Salesforce from outside the platform using APIs and OAuth 2.0 authentication. It could be:
- A web portal built on .NET, Java, or Node.js consuming Salesforce REST APIs.
- A mobile app that lets users view or update Salesforce data.
- A middleware system like MuleSoft, Boomi, or Informatica performing data sync.
- A custom integration running in AWS, Azure, or on-premise servers.
In all these cases, Salesforce needs to recognize and trust the external application before allowing data access — that trust is established through a Connected App.
Why to use a External Client App?
A External Client App acts as the bridge between Salesforce and an external client.
It defines:
- Who the external client is (client ID, secret).
- How it connects (OAuth 2.0 flow).
- What it can access (OAuth scopes).
- For how long it stays connected (policies, token lifetime).
By using OAuth, Salesforce ensures secure, token-based authentication without exposing user credentials.
How to Create an External Client App in Salesforce?
Follow the steps to configure an external client app using the External Client App feature:
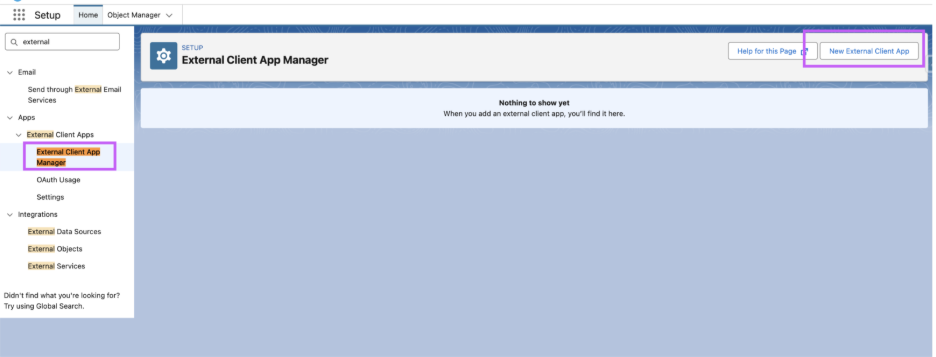
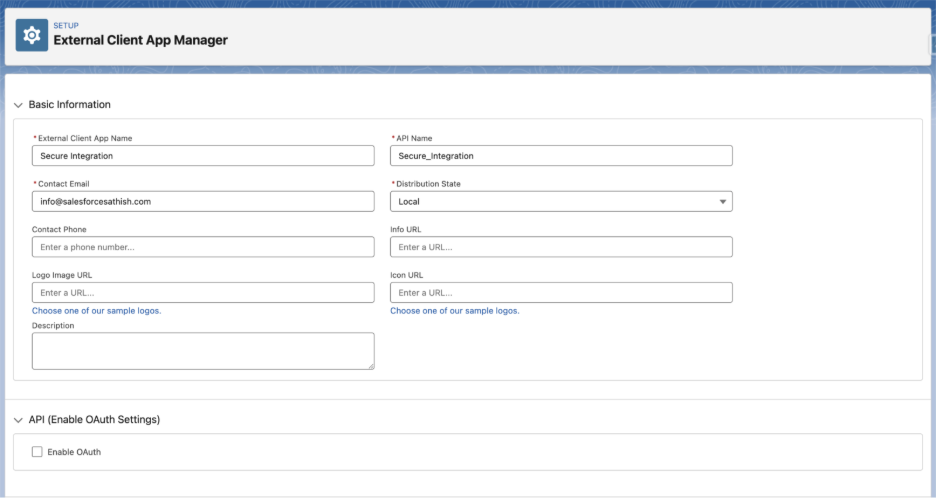
Step 1: Navigate to Setup
- Go to Setup → External Client App Manager → New External Client App.
Step 2: Define Basic Information
- Enter External Client App Name, API Name, and Contact Email.
Step 3: Enable OAuth Settings
- Check “Enable Oauth”
- Provide a Callback URL (the endpoint in your external app that receives the OAuth response). Example: https://salesforcesathish.com/oauth/callback
- Select the OAuth Scopes your app needs (e.g., Full access (full), Access and manage your data (API)).

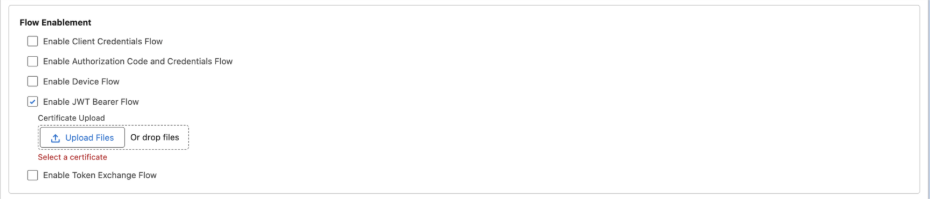
Step 4: Choose OAuth 2.0 Flow Enablement
Depending on your use case:
- Enable Client Credentials Flow
Used for server-to-server integrations without user interaction. The external app authenticates using its client ID and secret to obtain an access token. I would recommend using JWT Bearer Flow for Server-to-Server integration. - Enable Authorization Code and Credentials Flow
Designed for web apps that act on behalf of a user. It involves an authorization code exchange (with optional PKCE) plus client credentials for secure token issuance. - Enable Device Flow
Used for devices or apps with limited input (e.g., IoT or terminals). The user authorizes access from another device, and the app polls for the access token. - Enable JWT Bearer Flow
Used for server-to-server authentication with digital certificates. The app signs a JWT assertion that Salesforce validates to issue an access token — no password needed. - Enable Token Exchange Flow
Enables token swapping between orgs or systems. It allows an app to exchange one valid token for another with different scopes or user context.
Step 5: Choose Security (Optional but Recommended)
- Require secret for Web Server Flow
- Require secret for Refresh Token Flow
- Require Proof Key for Code Exchange (PKCE) extension for Supported Authorization Flows
- Enable Refresh Token Rotation
- Issue JSON Web Token (JWT)-based access tokens for named users

Note: I will be talking about manage policies in very detail upcoming article.
Step 6: Click “Create” button to create External Client App.
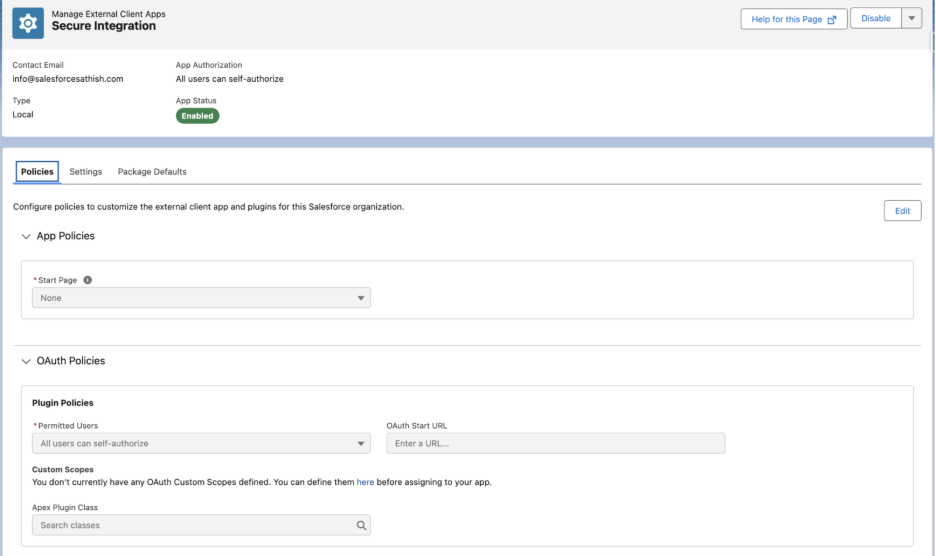
Step 7: Manage Policies (Optional but Recommended)
After External Client App create you can set additional security controls such as:
- IP ranges and refresh token policies
- Session timeout settings
- Who can use the app (Profiles or Permission Sets)
Note: I will be talking about manage policies in very detail upcoming article.
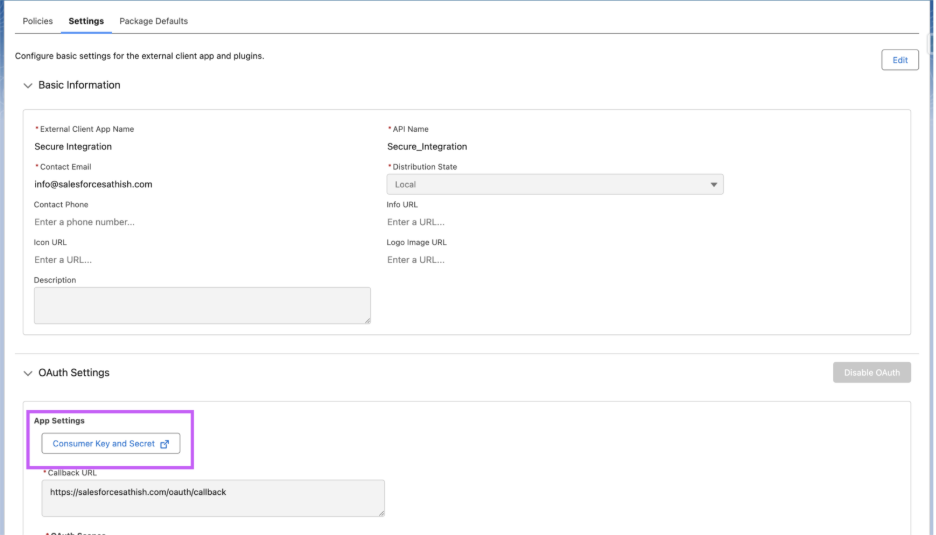
Step 8: Retrieve Keys
Now the client ID and secret key are available for integration.
You can download them by clicking the “Consumer Key and Secret” button.
Note: For security reasons, you will be redirected to a verification page before the client ID and secret key are displayed.
Conclusion
As Salesforce continues to evolve its identity and integration architecture, External Client Apps represent the next step toward scalable, secure, and standards-based API connectivity. Adopting them today ensures your integrations are ready for future-ready enterprise security models.
Additional Reference Links
- “External Client Apps” official help article – External Client Apps Salesforce
- “OAuth Authorization Flows” overview article – OAuth 2.0 Authorization Flows Salesforce
- Step-by-step on configuring OAuth for External Client App – Configure the External Client App OAuth Settings Salesforce
- Detailed guide for the Client Credentials Flow with External Client Apps — How to Set Up External Client Apps with OAuth Client Credentials Flow